It’s beginning to look a lot like yarn-mas! If you’re dreaming of a handmade Christmas, this free crochet bow pattern is the perfect way to sprinkle some festive flair into your decorations. Whether you’re dressing up your Christmas tree, adding a personal touch to gift wrap, or crafting cosy garlands, these adorable bows are quick to make and look so effective.
Designed with beginners in mind and ideal for using up leftover yarn, this pattern is a merry little project that brings joy stitch by stitch. So grab your hook, pick your favourite holiday colours, and let’s crochet some Christmas magic!
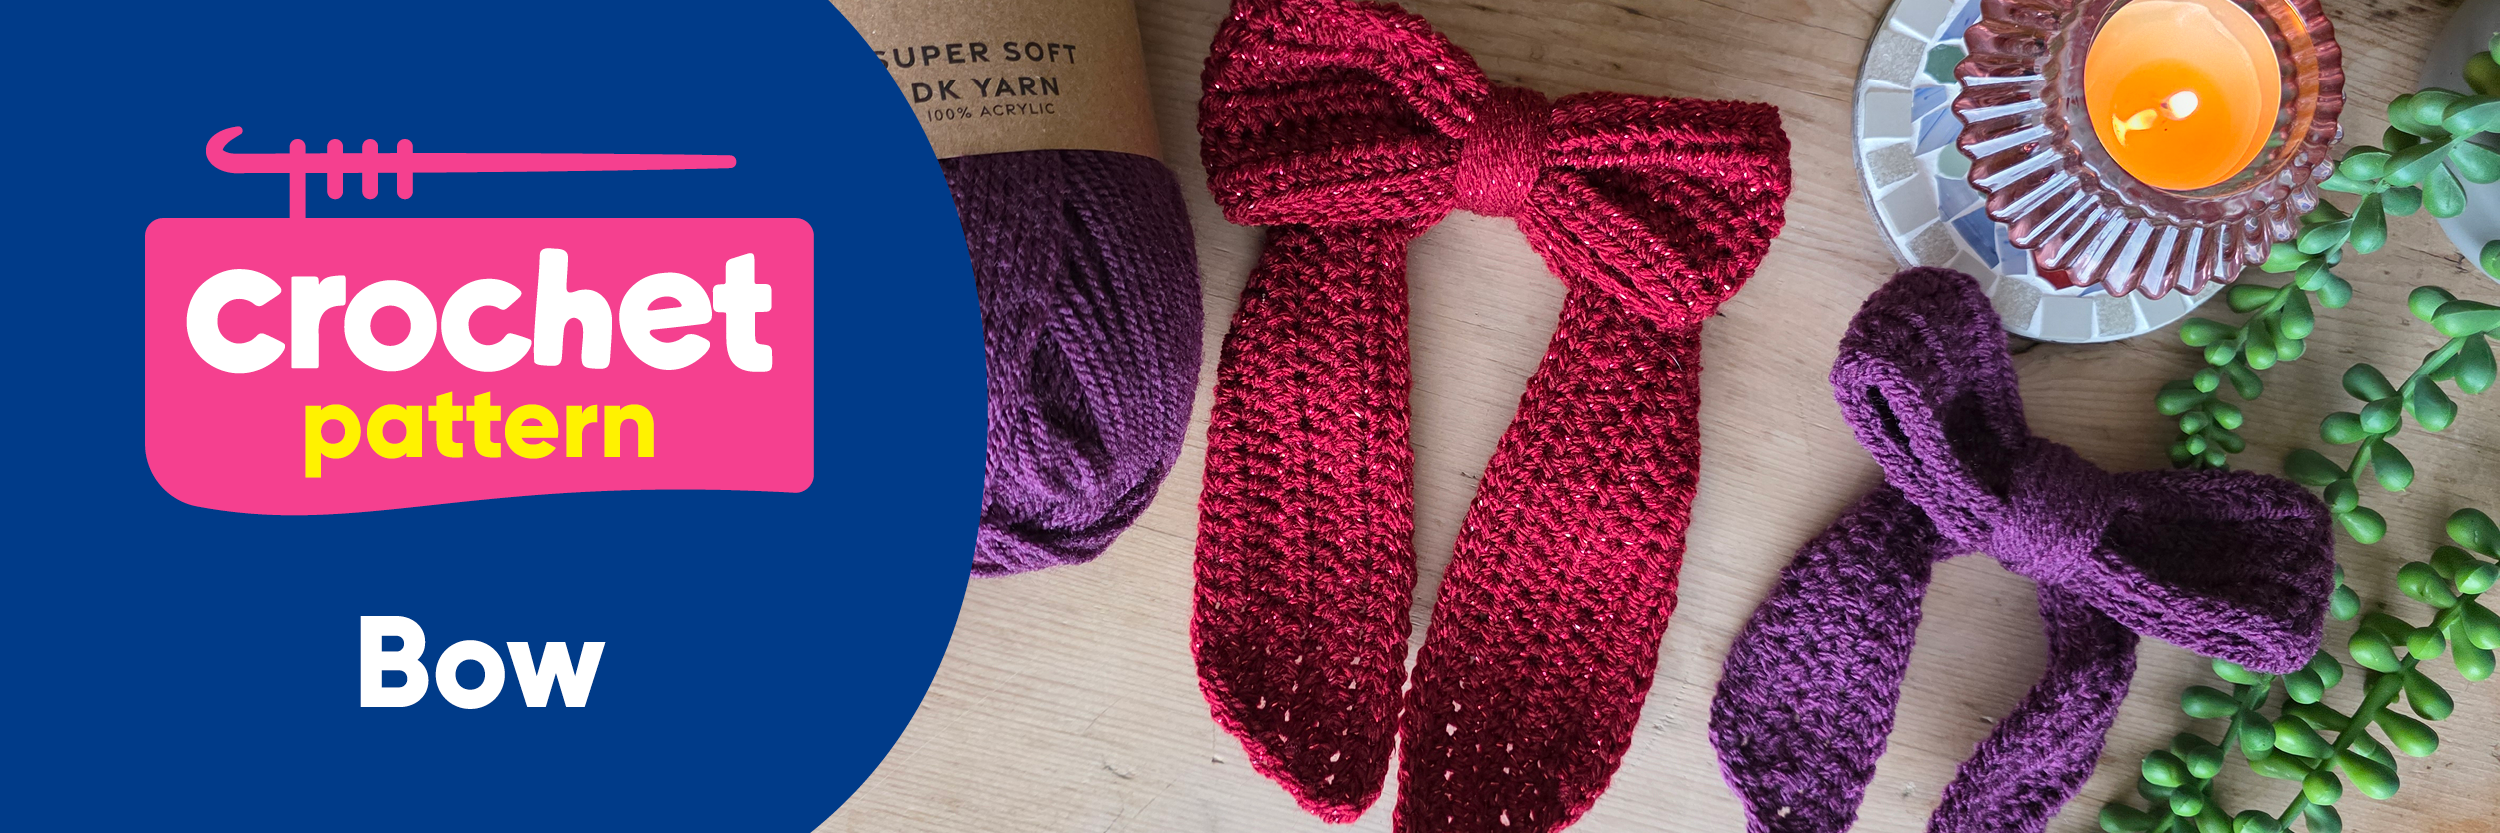
Crochet Bow — Free Pattern
By EmKatCrochet

Measurements
Small Bow – approx. 13cm wide x 13cm tall
Large Bow – approx. 13cm wide x 20cm tall
Materials
Yarn – Make & Create DK
- Deep Plum
- Burgundy Sparkle
Hook – 4mm
Scissors
Notes
- Patterns written in UK Terms.
- Patterns worked in rows.
Abbreviations
Ch – Chain
SS – Slip Stitch
HTR – Half Treble Crochet
INC - 2 or more stitches in the same stitch
STS – Number of stitches
Tension
10 stitches x 4 rows (5cm x 5cm) with half treble crochet stitch.
Pattern
Small Bow
Piece 1 - To Start: With Deep Plum chain 31, work in the 2nd chain from the hook.
Row 1: Htr inc in the first ch, 28htr in each ch to the last ch, htr inc in the last ch, turn [32 sts]
Row 2: Ch1, htr inc, 30htr, htr inc in the last st, turn [34 sts]
Row 3: Ch1, htr inc, 32htr, htr inc in the last st, turn [36 sts]
Row 4: Ch1, htr inc, 34htr, htr inc in the last st, DO NOT TURN [38 sts]. You are now going to ss around your first piece.
Row 5: Ch1, ss evenly across the edge of your bow, now ss in each stitch along the bottom edge of your bow, ss evenly along the other edge of your bow, then ss in each stitch along the top of your bow.
Piece 2 - To Start: With Deep Plum chain 46, work in 2nd chain from the hook.
Row 1: Htr in each ch across, turn [45 sts]
Row 2: Ch1, 45 htr, turn [45 sts]
Rows 3 & 4: Repeat row 2. DO NOT TURN AFTER ROW 4.
You are now going to ss around your second piece.
Row 5: Ch1, ss evenly across the edge of your bow, now ss in each stitch along the bottom edge of your bow, ss evenly along the other edge of your bow, then ss in each stitch along the top of your bow.
Fasten off leave a long tail on piece 2 but sew all the other ends in on both pieces.
Assembly
Piece 2 – Thread the long tail onto your needle and whip stitch the 2 bow ends together.
Now take piece 1 of your bow and layout in an arch.
Lay piece 2 on top of piece 1 with your join at the back.
Now taking your Deep Plum yarn, wrap the yarn around the middle of both pieces at the top to form and secure your bow.
Fasten off and sew your last end in.
Large Bow
Your large bow is worked in the same way as your small bow, there are more rows and stitches for the large bow, so please refer to step by step pictures from the small bow.
Piece 1 - To Start: With Burgundy Sparkle chain 61, work in the 2nd chain from the hook.
Row 1: Htr inc in the first ch, 58htr in each ch to the last ch, htr inc in the last ch, turn [62 sts]
Row 2: Ch1, htr inc, 60htr, htr inc in the last st, turn [64 sts]
Row 3: Ch1, htr inc, 62htr, htr inc in the last st, turn [66 sts]
Row 4: Ch1, htr inc, 64htr, htr inc in the last st, turn [68 sts]
Row 5: Ch1, htr inc, 66htr, htr inc in the last st, turn [70 sts]
Row 6: Ch1, htr inc, 68htr, htr inc in the last st, DO NOT TURN [72 sts]
You are now going to ss around your first piece.
Row 7: Ch1, ss evenly across the edge of your bow, now ss in each stitch along the bottom edge of your bow, ss evenly along the other edge of your bow, then ss in each stitch along the top of your bow.
Piece 2 - To Start: With Burgundy Sparkle Plum chain 46, work in 2nd chain from the hook.
Row 1: Htr in each ch across, turn [45 sts]
Row 2: Ch1, 45 htr, turn [45 sts]
Rows 3 & 6: Repeat row 2. DO NOT TURN AFTER ROW 6.
You are now going to ss around your second piece.
Row 7: Ch1, ss evenly across the edge of your bow, now ss in each stitch along the bottom edge of your bow, ss evenly along the other edge of your bow, then ss in each stitch along the top of your bow.
Fasten off leave a long tail on piece 2 but sew all the other ends in on both pieces.
Assembly
Piece 2 – Thread the long tail onto your needle and whip stitch the 2 bow ends together.
Now take piece 1 of your bow and layout in an arch.
Lay piece 2 on top of piece 1 with your join at the back.
Now taking your Burgundy Sparkle yarn, wrap the yarn around the middle of both pieces at the top to form and secure your bow.
Fasten off and sew your last end in.
Tied with Love
And just like that, you’ve added a sprinkle of handmade joy to your festive season! Whether your bows are adorning gifts, garlands, or tree branches, they’re sure to bring smiles and sparkle. We’d love to see how you use them — share your creations and spread the cheer! Until next time, happy hooking and happy holidays.


