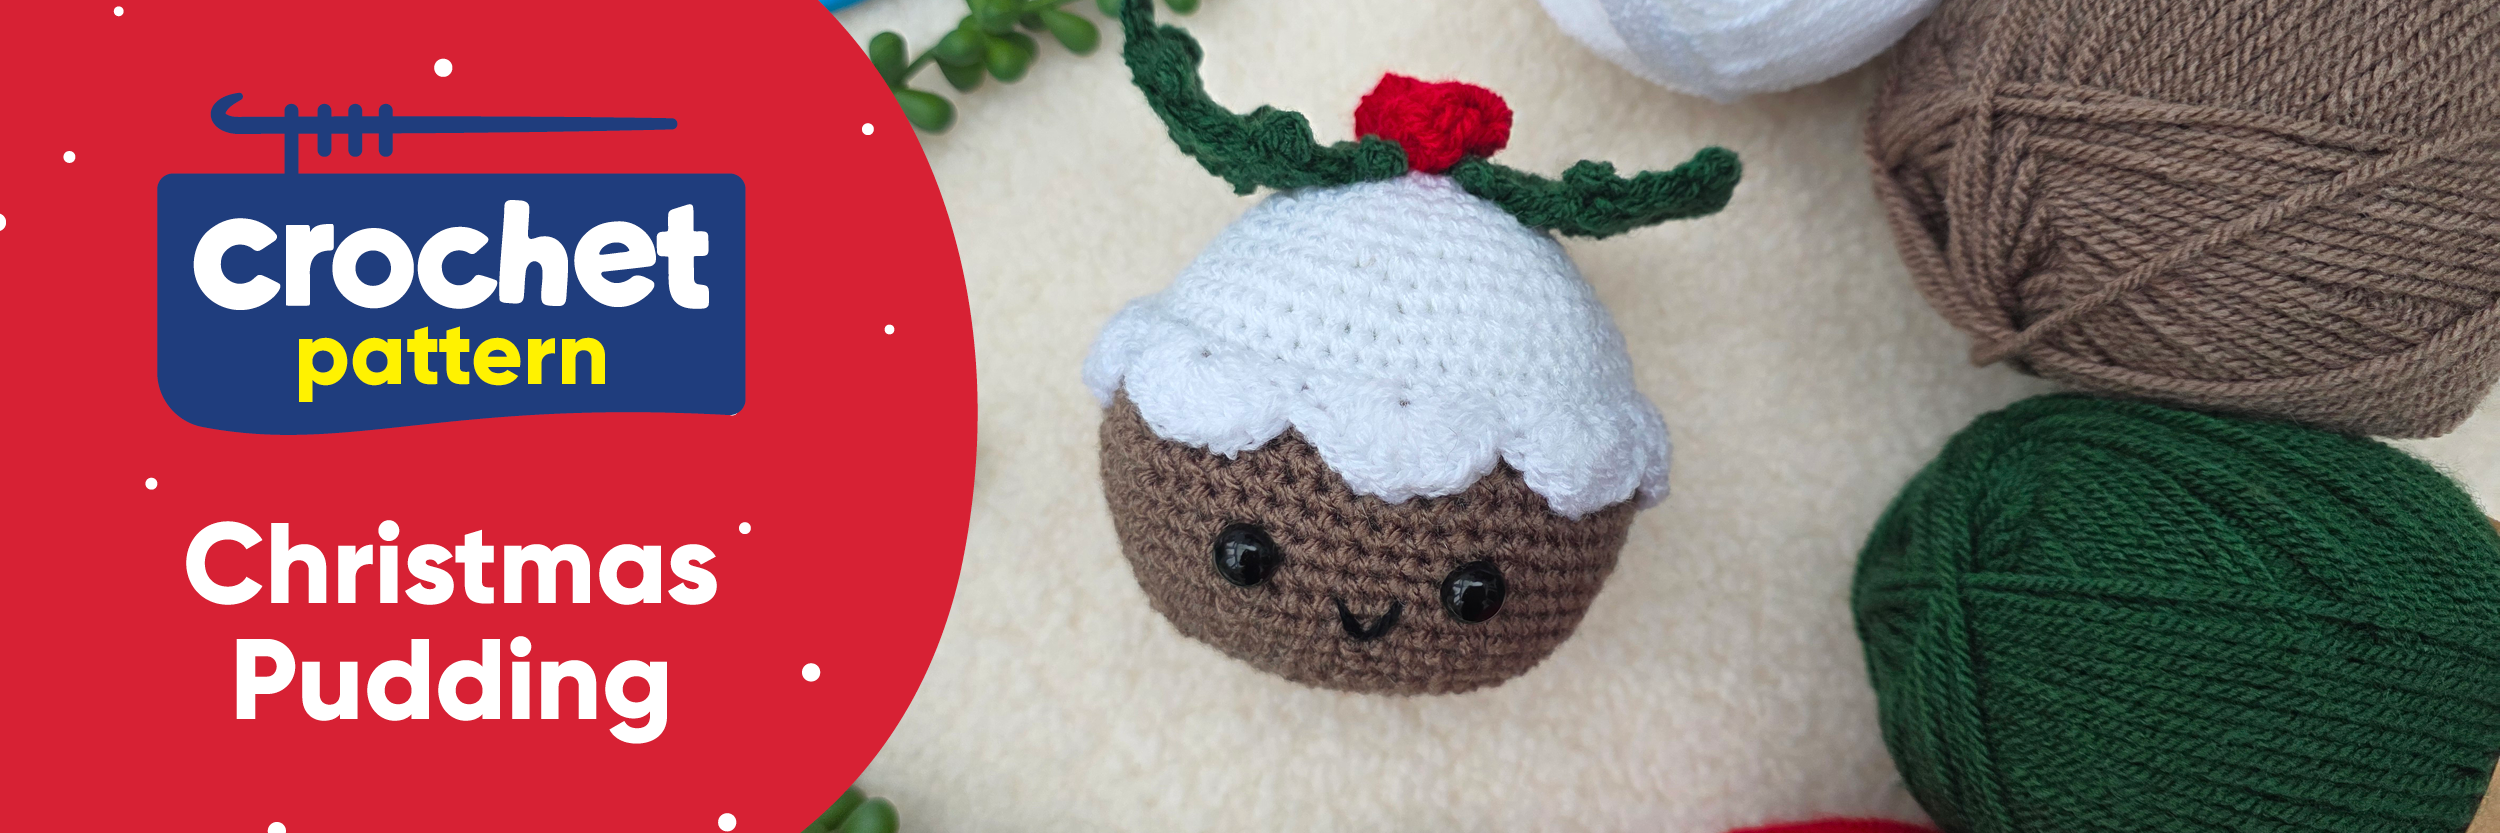
Get ready to crochet the cutest dessert of the season! This free Christmas pudding amigurumi pattern is bursting with festive charm and with an adorable little face, it's guaranteed to make you smile. Whether you're crafting handmade gifts or adding a whimsical touch to your tree, this sweet little pudding is the perfect festive companion.
Designed with beginners in mind and ideal for using up leftover yarn, this pattern is quick, fun, and full of personality. So grab your hook, pick your favourite pudding-inspired shades, and let’s stitch up a holiday treat.
Crochet Christmas Pudding — Free Pattern
By EmKatCrochet

Measurements
Approx. 8cm wide x 9cm tall
Materials
Yarn – Make & Create DK
- Pure White
- Taupe
- Ruby Red
- Fir Tree
- Black
Hook – 4mm
1 pair of 9mm safety eyes
Scissors
Notes
- Patterns written in UK Terms.
- The main part of the pattern is worked in rounds.
- All the different elements of the pattern are worked in the round. ( ) work as many times as stated.
- Berries are made with 2 cluster stitches joined together to form a berry.
- Pudding made from the top down.
Abbreviations
MR – Magic Ring,
CH - Chain,
SS – Slip Stitch,
DC – Double Crochet,
HTR – Half Treble Crochet,
TR – Treble Crochet,
DTR – Double Treble Crochet,
FLO – Front Loop Only,
BLO – Back Loop Only,
INC – 2 stitches in the same stitch,
STS – Number of stitches at the end of the round,
DC2TOG – Decrease Stitch
Special Stitches
Pom Pom (Treble Cluster Stitch joined) – *Yarn over, insert hook into the stitch, yarn over, draw up a loop (3 loops on your hook), yarn over, draw through 2 loops, (2 loops on your hook)** repeat *to** 4 more times and you should have 5 loops on your hook, yarn over and draw through all loops on your hook. Ch3 and repeat all the above, ch1 to secure the stitch, ss into the initial stitch.
Picot Stitch – Ch2, ss into the 2nd chain.
Tension
11 stitches x 11 rows (5cm x 5cm) with double crochet stitch.
Pattern
Icing and Christmas Pudding
To Start: In Pure White start with a MR
Round 1: 6dc into the ring, pull tight [6 sts]
Round 2: (dc inc) x 6 [12 sts]
Round 3: (1dc, 1dc inc) x 6 [18 sts]
Round 4: 1dc, 1dc inc, (2dc, 1dc inc) x 5, 1dc [24 sts]
Round 5: (3dc, 1dc inc) x 6 [30 sts]
Round 6: 2dc, 1dc inc, (4dc, 1dc inc) x 5, 2dc [36 sts]
Round 7: (5dc, 1dc inc) x 6 [42 sts]
Round 8: 3dc, 1dc inc, (6dc, 1dc inc) x 5, 3dc [48 sts]
Round 9: (7dc, 1dc inc) x 6 [54 sts]
Rounds 10 – 11: 54dc [54 sts]
Round 12: FLO, 54dc [54 sts]
Round 13: *ss, miss 2, 7tr inc, miss 2,** repeat from * to ** 8 more times, ss [72 sts] Cut yarn and leave a long tail.
Attach Taupe to a BLO from round 12.
Rounds 14 – 21: 54dc [54 sts]
Round 22: (7dc, dc2tog) x 6 [48 sts]
Round 23: 3dc, dc2tog, (6dc, dc2tog) x 5, 3dc [42 sts]
Round 24: (5dc, dc2tog) x 6 [36 sts]
Round 25: 2dc, dc2tog, (4dc, dc2tog) x 5, 2dc [30 sts]
Round 26: (3dc, dc2tog) x 6 [24 sts]
Now is a good time to insert your safety eyes. I placed mine between rounds 19 & 20 with 4 stitches apart.
Round 27: 1dc, dc2tog, (2dc, dc2tog) x 5, 1dc [18 sts]
Round 28: (1dc, dc2tog) x 6 [12 sts] Stuff your pudding here firmly.
Round 29: (dc2tog) x 6 [6 sts]
Fasten off yarn, close opening by threading your end onto your needle and weaving through the last 6 stitches and pulling the yarn to close the hole tight, sew ends in.
Holly Berries
To Start: In Ruby Red ch5, in the 4th chain from the hook, Pom Pom stitch (see special stitches), ch1, Pom Pom stitch.
Fasten off yarn, leaving a long tail to sew onto the pudding, sew any ends in.
Holly Leaves - make x2
To Start: In Fir Tree ch9, Work in the 2nd chain from the hook.
Round 1: 1dc inc, htr, tr, dtr, 2tr, htr, 3dc inc in the last ch, now work back up along the other side, htr, 2tr, dtr, tr, htr, dc [18 sts]
Round 2: 2ss, picot (see special stitches), *3ss, picot** repeat from * to ** 1 more time, 2ss, picot, 2ss, picot, repeat * to ** x 2 more times, ss [26 sts]
Break yarn, leaving a long tail to sew onto the pudding, sew any ends in.
Assembly
Sew your icing skirt onto the pudding to secure.
Sew your Holly leaves and berries onto the top of your pudding.
Take a length of Black and sew a smile onto your pudding just below the eyes in the centre.
Fasten off and sew your last end in.
A Handmade Treat
And there you have it, your very own yarn-crafted Christmas pudding, ready to spread joy and smiles! Whether it’s part of your holiday decorations or a thoughtful handmade gift, this amigurumi treat is sure to become a festive favourite. Don’t forget to share your creations — we’d love to see your pudding parade! Until next time, happy crocheting and happy holidays.


