There’s a tiny kind of magic in painting on wood — a smooth, tactile surface that turns a few brushstrokes into a little keepsake you’ll use every day. In this DIY painted wooden bookmark tutorial, you’ll learn how to transform simple wooden blanks into whimsical, handmade bookmarks perfect for readers and gift‑givers.
This playful, screen‑free craft is quick, beginner‑friendly, and full of charming possibilities: think soft washes of colour, tiny doodled motifs, and a ribbon that flutters out of your favourite page. Grab your paints, a cuppa, and a quiet corner — let’s make a bookmark that marks more than a page.
DIY Painted Wooden Bookmark Craft
Tutorial by Bethany Edwards
You’ll need:
- A wooden bookmark
- Acrylic paints (or pens, if you prefer)
- Paint brushes (a mix of sizes works best)
- A jar of water and a cloth for cleaning brushes
- A protected surface (paper, cardboard, or an old cloth)
- Your bookmark tassel (removed and set aside to begin with)
Step 1: Begin by removing the tassel from your bookmark and placing it somewhere safe. Set your bookmark down on a protected surface, ready to work on.
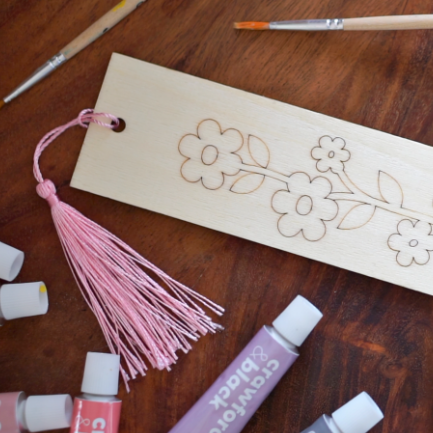
Step 2: Take a moment to think about your design (the pre-outline of the wooden bookmark really helps as a starting point). You could go bright and bold or perhaps simple and calming.
Step 3: Paint your background colour, brushing it gently across the wood. Then leave it to dry fully.
Step 4: Once dry, add a second layer to build a soft, even base. Allow this to dry again. This is where a little patience and popping the kettle on comes in.
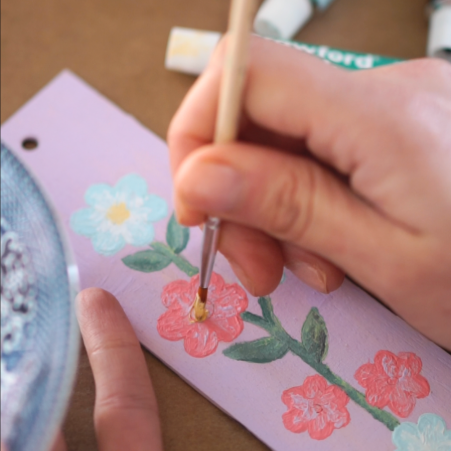
Step 5: Start to build your design slowly. Begin with the main shapes and colours, don’t worry if it looks rough to begin with. The beauty of acrylic paint is that you can go back and change details, building on top of the previous layer.
Step 6: As you go, add in smaller details. Little touches that bring your bookmark to life. There’s no rush here, just enjoy the process. Allow each layer to dry before continuing.
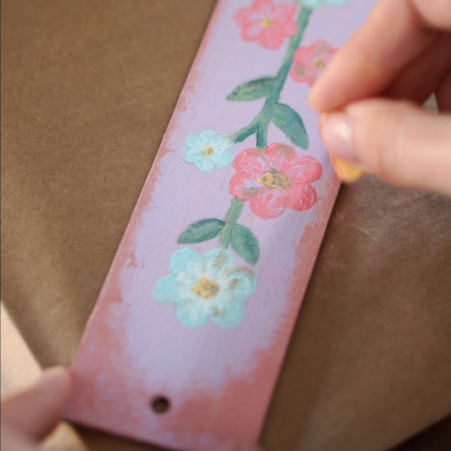
Step 7: You can add further dimension to your bookmark by sponging paint around the edges, adding polka dots to the background, or even outlining details in pen.
Step 8: When everything is dry, and you’re happy with your piece, gently reattach the tassel.
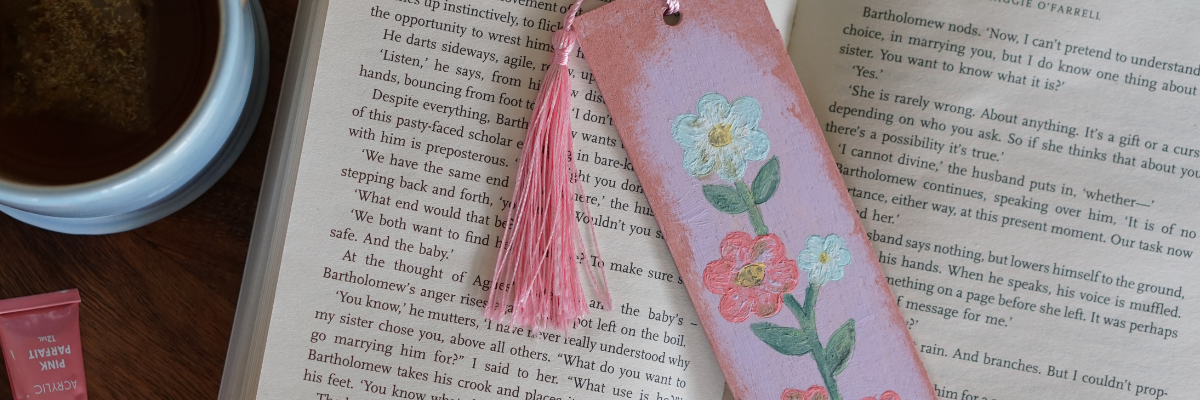
Step 9: Slip your finished bookmark into your current book, ready to mark your place in a story, made just a little more special by your own hands.
Time Well Spent
Your painted wooden bookmark is ready to slip into a favourite book and flutter open a thousand small pauses. This simple DIY painted wooden bookmark craft turns a few brushstrokes into a keepsake you’ll use again and again — a sweet, screen‑free moment you can gift or keep. If you loved this make, try one of our other easy DIY bookmark ideas or wander the Inspiration hub for more playful, handmade projects that invite slow creativity.


