Let’s talk about that universal parenting truth: bored kids + garden = chaos. We’re talking hosepipe duels, mud pie fights, someone trying to “plant” a Lego, the list goes on.
But what if you channelled that wild energy into something… crafty?
Something colourful.
Something creative.
Something that doesn’t end with you googling “how to get grass stains out of everything.”
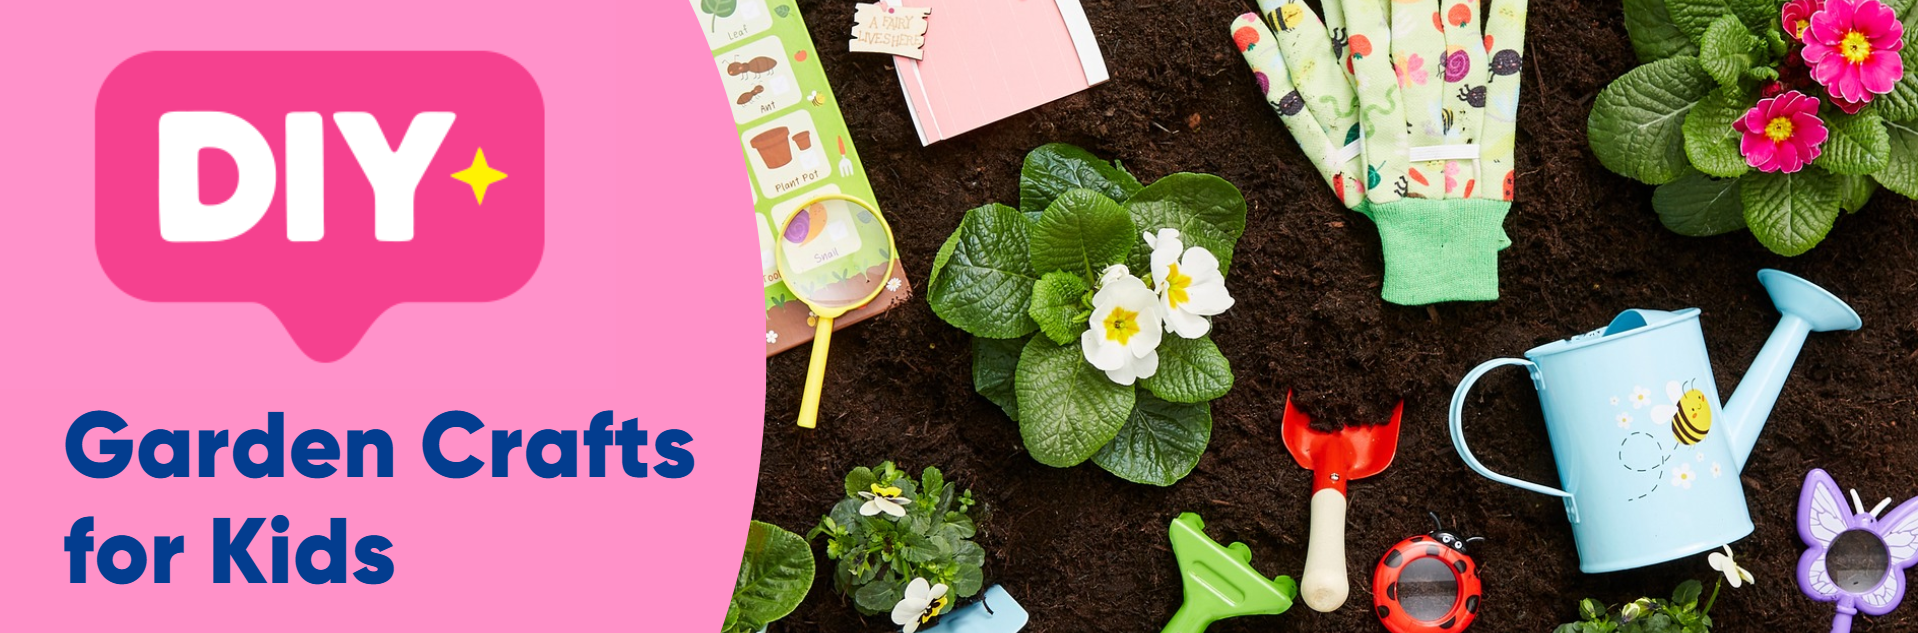
That’s where these 9 DIY garden crafts for kids come in. They’re fun, a little messy, and some of them are actually useful! From bee hotels to rainbow wind spinners, fairy doors and monster planters, these garden crafts are the perfect way to keep your little ones occupied and engaged in healthy, creative outdoor activities. And, because it’s outside, your carpets stay safe and your kids can get covered in all the glitter and googly eyes they like!
Ready to turn your garden into a DIY wonderland and get the kids off their screens for more than 12 seconds?
Let’s dig in. (Literally.)
Easy DIY Garden Crafts For Kids
DIY Bee & Ladybird Rock Painting

Transform ordinary stones into adorable garden critters with a dash of paint and a splash of creativity. Sure, you might end up doing most of the painting (while the kids are in charge of “creative direction”), but once they realise how easy it is, they’ll be outside painting rocks all day like an insect artist.
Your little ones will love moving new residents into the fairy garden, and every so often, they’ll spark a new story or game. It’s the kind of DIY craft that keeps giving, long after the paint dries.
Want to make your own buzzing, bumbling bug buddies? Here’s how to make bee and ladybird painted rocks.
What You’ll Need:
- Nice round stones that you can gather on a nature walk
- Red, white, black and yellow acrylic paint
- Black permanent marker
- Mod Podge/acrylic sealer
- Googly eyes (optional, but they look cute!)
- Paint brush
How To Make It:
1. Clean the stones and let them dry.
2. Paint the entire stone red and allow it to dry.
3. Add a black head, spots, and a line down the middle to mimic wings.
4. Use white paint for the eyes or glue on googly eyes.
5. Once dry, apply a sealant or Modge Podge to protect your ladybird from the elements.
Find the full tutorial here .
DIY Fairy Door

Warning: May encourage belief in fairies.
Stick one of these little fairy doors at the base of a tree or along the fence, and your garden just got its own magical portal! Where does it lead? No idea. Probably somewhere fabulous. (Or at least to a small, glitter-loving community with excellent taste in sequins.)
These DIY fairy doors are incredibly easy to make, and kids go wild decorating them with everything from buttons to pom-poms to flowers — if it fits, it sticks. Honestly, the more over-the-top, the better.
Now excuse us while we go check if anyone’s knocked on ours lately…
What You’ll Need:
- Wooden lolly sticks
- Glue
- Paints and brushes
- Decorative embellishments (buttons, sequins, etc.)
How To Make It:
1. Arrange and glue lolly sticks to form a door shape.
2. Paint and decorate the door as desired.
3. Once dry, place the door in your chosen garden spot
Find the full tutorial here.
DIY Camping Lantern

Got a camping trip coming up? Or just pitched a pop-up tent in the garden so the kids can "sleep under the stars" (aka five minutes before they’re back inside asking for snacks)?
Either way, you’re gonna need a light. And nothing says "we’re outdoorsy" like a mason jar covered in pom-poms and held together with hope.
Ready to light up your camping adventures? Grab your glue gun and let's get crafting!
What You'll Need:
- A mason jar
- A small paper plate
- White card
- Acrylic paints in your favourite colours
- Coloured wool (the funkier, the better)
- Glue
- An LED tea light or fairy lights
How to Make It:
1. Poke a small hole in the centre of the paper plate.
2. Cut a strip of white card measuring 25cm by 3.5cm. Paint both the strip and the underside of the paper plate in your chosen colour.
3. Paint flowers of varying sizes onto your jar using complementary colours. Think 'flower power' meets 'campfire chic'.
4. Once everything is dry, wrap the painted card strip around the jar’s lid and glue it securely in place.
5. Thread a piece of coloured wool through the hole in the paper plate and tie several knots to keep it secure. For extra strength, add a small blob of glue and let it dry.
6. Stick the lid onto the jar, add your light source inside, and voilà! Your lantern is ready to shine.
Find the full tutorial here.
DIY Planet Earth Seed Balls

This DIY garden craft is perfect for your tiny eco-warriors. It’s fun, a bit messy, and (bonus!) is actually good for the planet. DIY Planet Earth Seed Balls is the craft that lets kids squish, squelch, roll, and save the bees, all in one go.
No complicated tools. No screens. Just squishy paper, a splash of paint, and a healthy dose of green-thumb energy.
What You’ll Need:
- Old A4 paper (the more scribbled-on, the better)
- Warm water
- Flour (yes, the one from the kitchen)
- A handful of native wildflower seeds
- Blue and green paint
- A mixing bowl
- A towel or muslin cloth for squeezing (prepare for sogginess)
How To Make It:
1. Tear up your paper into tiny strips and soak them in warm water. Get your hands in and mush it into pulp.
2. Plop it into a cloth and wring it out.
3. Throw the pulp into a bowl and stir in 2 parts flour to 1 part water
4. Sprinkle in your wildflower seeds. Not too many, or you’ll have a plant party in one ball.
5. Split your mix into two. Add blue paint to one, green to the other.
6. Take a bit of each colour and smoosh them together into a lovely little planet.
7. Leave them out in the sun to harden. Try not to poke them every five minutes (we know, they’re tempting).
8. Once they’re dry, toss them in the garden, a flowerbed, or that sad empty patch near your shed for a future bee buffet.
Find the full tutorial here.
DIY Paint Stick Garden Signs

Let’s be honest; sometimes, getting kids to help in the garden is… optimistic.
You could ask them to weed the flowerbeds. (Groans.) You could ask them to water the plants. (Hosepipe wars.) Or, you could hand them some paint, a pile of craft bits, and some wooden sticks, and then accidentally end up with the cutest garden signs on your street.
This DIY is perfect for little hands who love mess, colour, and declaring “THIS ONE’S MY PLANT”. You’ll get custom markers for your herbs and veggies; they’ll get to paint stuff without getting it in the carpet.
What You’ll Need:
- Wooden sticks (paint mixing sticks work best)
- Acrylic paint
- Paintbrushes
- Permanent markers
- Optional decorative extras: glitter, googly eyes, stickers, buttons, pompoms, etc.
How To Make Them:
1. Paint your sticks with bright base colours. Let them dry.
2. Decorate however you like. Polka dots? Smiley faces? A self-portrait of your carrot? Go for it.
3. Write the plant names with permanent marker. Stick them in the soil. Bask in the glory.
Find the full tutorial here.
DIY Grass Head Garden Buddies

You know those crafts that are so simple you’re annoyed you didn’t think of them first?
This is one of those.
Grass Heads are part garden experiment, part arts and crafts session, and 100% adorable. Your little ones will get to make their own little plant-headed pal, and then watch its grass hair grow. (And yes, they will absolutely give it a name, a backstory, and probably try to feed it snacks.)
What You’ll Need:
- Old tights or stockings
- Grass seed
- Soil or compost
- Elastic bands
- A cup or pot to sit your grass head in
- Googly eyes, felt, pipe cleaners… basically whatever weirdness your child can glue on
How To Make It:
1. Put grass seed in the toe of the stocking.
2. Add compost on top. Tie into a ball with an elastic band.
3. Decorate a face. (The sillier, the better.)
4. Sit in a cup with water. Keep it moist.
5. Wait. Watch. Delight in “Steve” sprouting his hair.
Find the full tutorial here.
DIY Lolly Stick Rainbow Wind Spinner

Ever looked at your garden and thought: “You know what this needs? A colourful spinning sculpture made out of ice lolly sticks.”
No?
Well, your kids will. Once they make one.
These rainbow wind spinners are a total crowd-pleaser. They’re easy to make, super satisfying to watch, and guaranteed to brighten up even the plainest patch of grass.
The best part? It’s just a bunch of sticks and string… but the end result gives you garden art that moves. Literally.
What You’ll Need:
- Jumbo lolly sticks (roughly 50)
- Strong thread or string
- A skewer or sharp pencil for poking holes (grown-up job!)
- Paints
- Paintbrushes
- Glue
How To Make It:
1. Paint your sticks in rainbow colours. Let them dry.
2. Stack them, twist them, and thread them carefully to form a spiral.
3. Tie them off so they hang and spin in the wind.
4. Stand back and admire your garden’s new hypnotic centrepiece.
Find the full tutorial here.
DIY Bumble Bee Hotel

Even bees deserve a 5-star stay, and you can give it a place to crash between pollen runs with your very own DIY Bumble Bee Hotel!
This garden craft is a win-win: the kids get to make something cool and messy, and the bees get a cosy little hotel right in your flower bed. It’s a hands-on way to teach little ones about the tiny, fuzzy superheroes who pollinate our food.
Plus, there’s something wildly satisfying about hanging up a homemade bee hotel and seeing it being enjoyed by tiny, fuzzy tenants checking in like, “Ah yes, twigs and bark, just how I like it.”
What You’ll Need:
- A clean tin can, flower pot, or wooden box
- Yellow & black paint (bee vibes only)
- Paintbrushes
- Sticks, twigs, bamboo tubes or hollow reeds (something for the bees to nest in)
- String
- Googly eyes or craft embellishments (optional, but hilarious)
How To Make It:
1. Paint your box yellow with black stripes. Let it dry.
2. Fill it tightly with twigs and stems - bees love hiding in nooks and crannies.
3. Tie string around it and hang it in a sunny but sheltered spot.
Find the full tutorial here.
Monster Can Planters

Grow plants. Scare slugs. Look fabulous doing it.
If that sounds like a bit of you, then you’re in luck with these DIY Monster Planters. All you need is a lick of paint, some googly eyes, and a mouth full of foam teeth, and you’ve got a ferocious, fabulous planter ready to gobble up the sunshine.
It's a fun, eco-friendly craft that adds a splash of personality to any garden. Plus, it's a great way to get kids excited about gardening and recycling.
Stick them on windowsills, flowerbeds, or line them up like a monster parade on the patio. The plants? Happy. The kids? Delighted. The cans? Living their best afterlife.
What You’ll Need:
- Empty tin cans (washed… seriously, don’t skip this)
- Acrylic paint in monster-approved colours
- Paintbrushes
- Googly eyes (the bigger, the better)
- Craft foam or felt for teeth, tongues, and wild eyebrows
- Glue
- Potting soil and small plants or herbs
How To Make It:
1. Paint your can and let it dry.
2. Glue or draw on a face with crazy eyes, teeth, or whatever weirdness your little one dreams up.
3. Fill it with soil, plant something green, and admire your new leafy overlord.
Find the full tutorial here.
The Garden Of Crafty Delights
Now you’ve got 9 DIY ways to transform your garden into the world’s most colourful craft zone (or at least the coolest one in your cul-de-sac).
Whether your little ones are painting pebbles, checking in guests to the bee hotel, or giving “Steve the Grass Head” his fifth haircut this week, you’ve now got a toolkit full of ideas to keep those hands busy and the complaints to a minimum.
So grab the paint and embrace the mess as your garden becomes the ultimate playground of creativity. Because when the kids are crafting, the only thing you’ll be planting is a chair.
After more DIY craft ideas? Try our DIY Box Frame Wildflower Wall Art Display. And if you’re looking for more inspiration, check out all our Art & Craft ideas on the blog!


