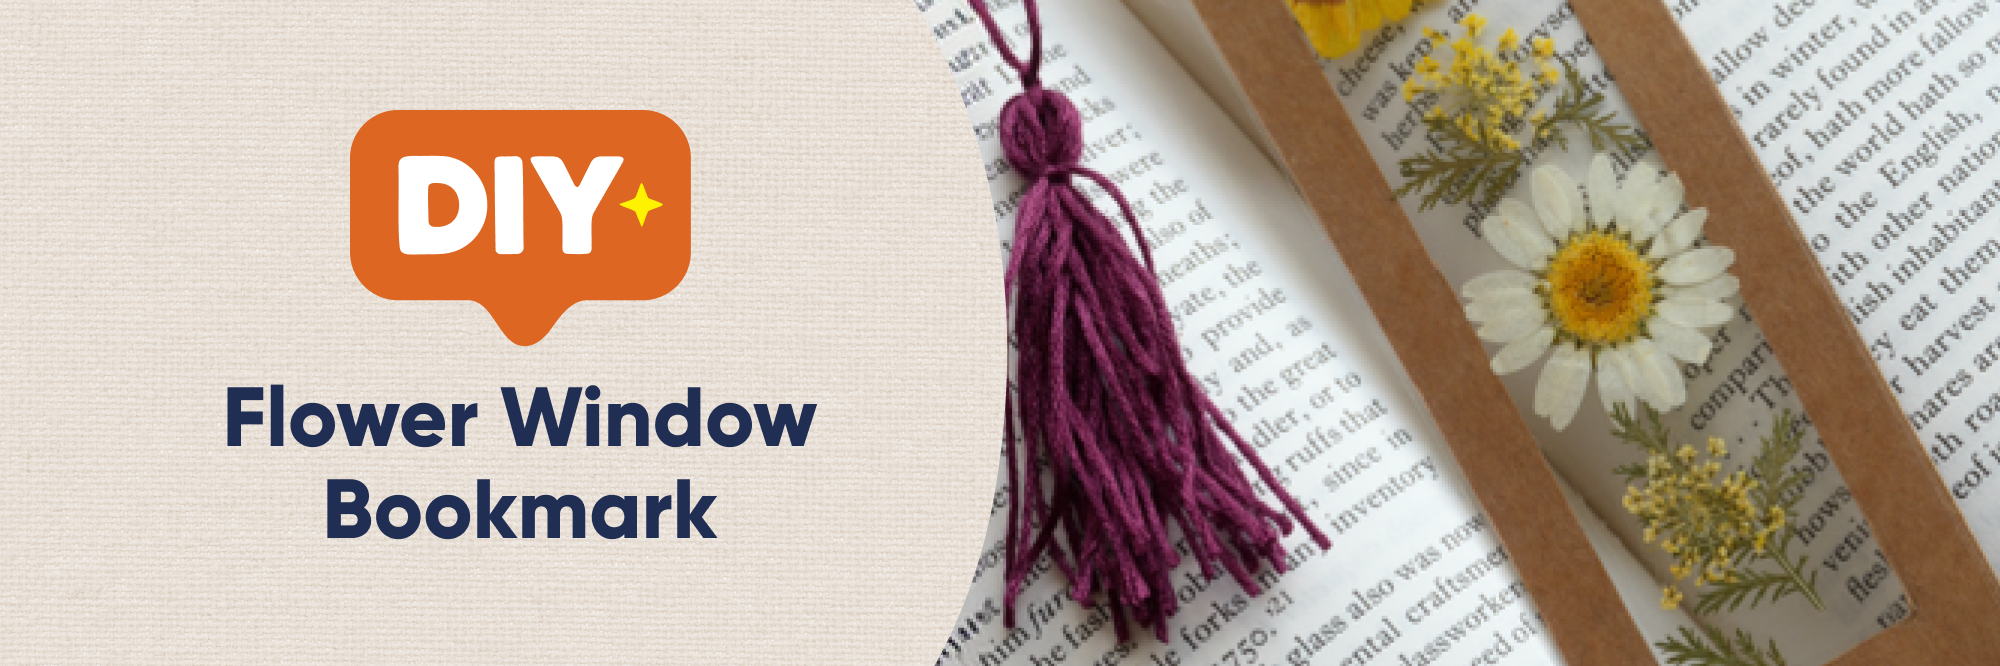
Wonderful books deserve a beautiful bookmark, and this easy diy bookmark project is a great way to preserve a little piece of the seasons between the pages of a favourite book. This bookmark uses a simple clear-tape “window” to protect delicate flowers and leaves, finished with an easy handmade tassel.
You can use plain card, patterned paper or even leftover pieces from another project, making each bookmark unique.
How to Make a Pressed Flower Window Bookmark
What You Need
- • Card or decorative paper
• Glue, if backing decorative paper with card
• A ruler and pencil
• Scissors
• A craft knife and cutting mat, optional*
• Wide clear parcel tape
• Completely dry pressed flowers or leaves
• Embroidery thread
• A hole punch
*If using a craft knife, make sure children are supervised by an adult.
How to Make the Bookmark Frame
Step 1: Begin by measuring out a rectangle for your bookmark. I like to make mine approximately the same width as my clear parcel tape. This means one strip of tape will cover the full width of the bookmark without needing to overlap several pieces.
Step 2: Cut out the bookmark shape. You can use coloured card, patterned paper or decorative paper glued onto card for a sturdier finish. If you are gluing paper onto card, allow it to dry fully before continuing.
Step 3: Use a ruler and pencil to draw a smaller rectangle inside the bookmark, leaving an even border around the outside. This will become the frame around your flower window. Remember to leave a slightly deeper border at the top so there is enough room to add the tassel later.
Step 4: Carefully cut out the centre of the frame. This part can be a little fiddly, so begin by making a small hole in the middle. Make several cuts out towards the edges, removing the card a little at a time. Once most of the centre has been removed, you can trim the edges to make them straighter and neater. A craft knife and cutting mat can also be used for this step.
Step 5: Unroll a piece of clear parcel tape slightly longer than your bookmark and place it on your work surface with the sticky side facing upwards. Carefully position the bookmark frame on top, pressing it gently onto the tape.
How to Add the Pressed Flowers
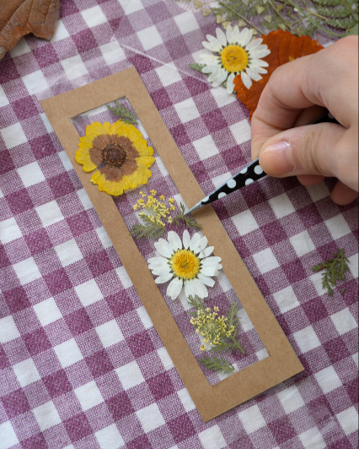
Step 6: Arrange your pressed flowers and leaves inside the window. Make sure everything you use is completely dry and fairly flat. You can keep the flowers neatly inside the frame or allow some of the petals and leaves to overlap the edges slightly.
Step 7: Unroll a second piece of clear tape and carefully line it up with the first. Starting at one end, slowly lower the tape over the bookmark, pressing out any air bubbles as you go. This creates a clear tape sandwich, sealing the flowers safely inside.
Step 8: Trim away the excess tape around the outside of the bookmark. You can trim it neatly against the card or leave a very narrow clear edge around it for a little extra protection.
How to Make a Tassel for Your Bookmark
Step 9: To make the tassel, wrap embroidery thread around four fingers at least ten times. The more times you wrap it, the fuller your finished tassel will be.
Step 10: Cut a separate piece of thread approximately 20cm long. Slide it underneath the top of the loops and secure it with a double knot. Tie the two loose ends together near their tips to create the loop that will attach the tassel to your bookmark.
Step 11: Take another short piece of embroidery thread and place it underneath the bundle, approximately 0.5cm below the top. Wrap it around the bundle several times, then secure it with a double knot. Trim away the loose ends.
Step 12: Cut through all the loops at the bottom of the tassel. Gently straighten the strands and trim the ends until they are approximately the same length.
Step 13: Punch a hole through the top border of the bookmark. Push the tassel’s hanging loop through the hole, then pass the whole tassel through its own loop and pull gently to secure it. This is known as a lark’s head knot.
Your pressed-flower bookmark is now ready to tuck inside your current read! Or give to someone as a thoughtful handmade gift.
Create Your Own Pressed Flower Window Bookmark
Making a pressed flower window bookmark is a wonderful way to combine crafting and nature while creating a personalised accessory for your books. Using simple materials and dried flowers, you can make a unique bookmark that's perfect for gifting, reading journals, book clubs or back-to-school crafts. Experiment with different flower colours, leaves and decorative papers to create a design that's entirely your own.