If a picture says a thousand words, then a scrapbook feels like an encyclopaedia about your life. Documenting it by splicing together pictures, words and little mementos that you collected along the way.
Yes, making a scrapbook is the way forward if you want something to sit down with, look back at and relive every memory. But we probably don’t need to tell you that if you’re already reading this post, do we?
If you’re creating your first scrapbook, you’ve probably got a few questions, like what supplies you need, how to get started, and if there are any tips for layouts.
In this post, we’ll give you a beginner's guide to scrapbooking that covers all of the above and more. So sit back, grab your scissors and pritt-stick and get ready to start scrapbooking.
What is scrapbooking?
In its simplest form, a scrapbook is an amalgamation of text, photos, cutouts and anything else in a blank book. But in reality, it is so much more than that. It’s a brilliant way of capturing the kaleidoscope of life, documenting and journaling life events. It can be used to capture big milestones, as a creative outlet to tell a story, or even as a stress reliever.
A Step-by-step guide to getting started with Scrapbooking

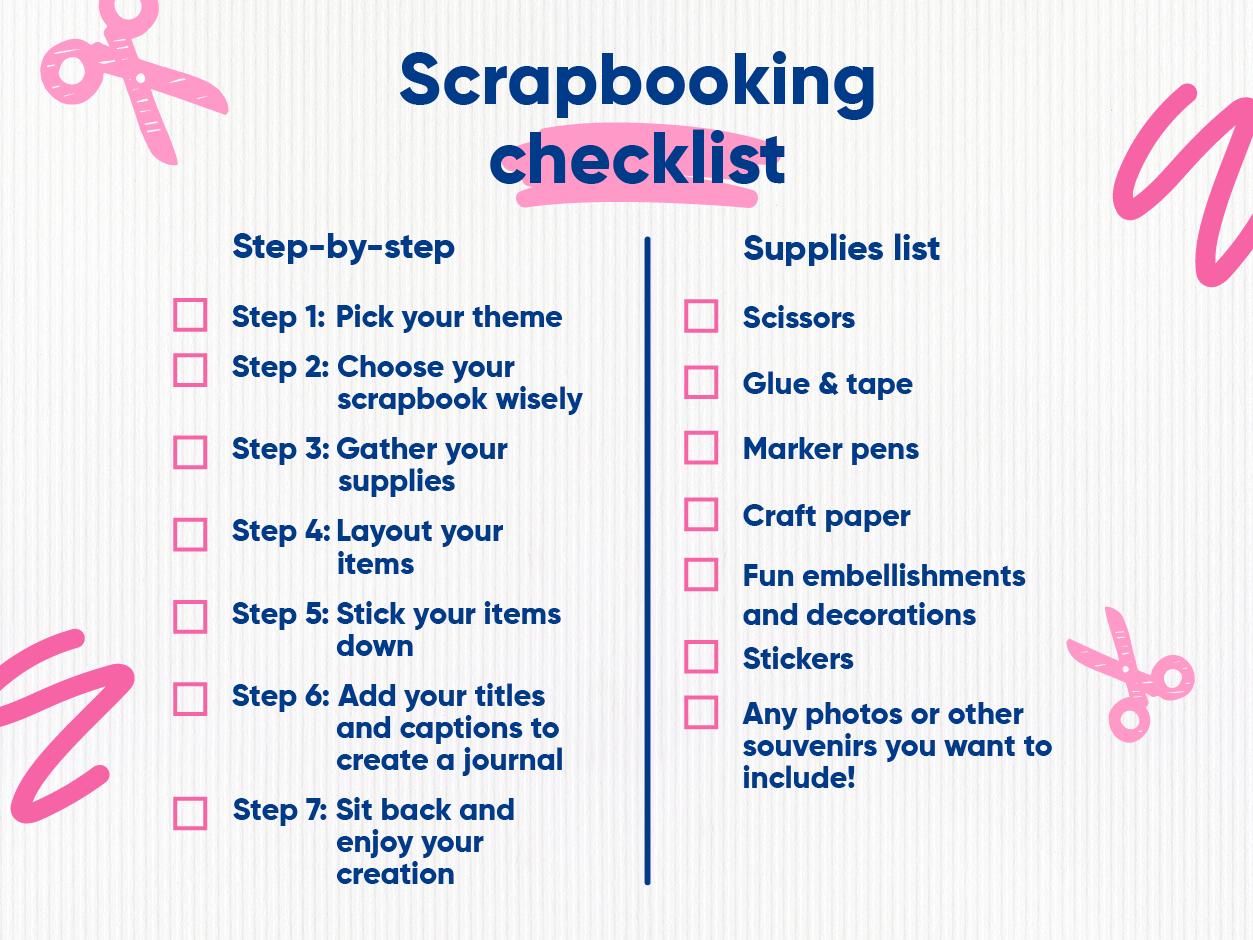
Step 1: Pick your theme
Your theme dictates the scrapbook supplies you’ll need, so you’ll want to spend some time before you get started thinking about the overall aesthetic and the layouts you want to use.
There are hundreds of resources online where you can find theme and layout inspiration, but some of our favourite places to find them are:
- Our post on 10 easy beginner scrapbook layouts
- Pinterest
- Youtube
- Instagram
- Paper Issues Facebook Group
- Scrapbooking Coach
Step 2: Choose your scrapbook wisely
Picking the wrong scrapbook can make or break your plans. Too small, and suddenly everything starts to look a little too cramped. Too big, and suddenly you’ve got a load of white space, and you’re struggling to fill it.
Our recommendation will always be to start with a 12 x 12-inch blank scrapbook. This should give you enough room to work with, and with the right paper to cover it, you can turn it into whatever you want.
Step 3: Gather your supplies
Once you’ve sorted your scrapbook, it’s all about getting the right supplies. Normally, people panic and don’t know what paper or embellishments to get because they have no idea what they want it to look like, but you should have already done the hard work figuring that out, so this step should be a breeze for you.
Essential scrapbook supplies:
- Scissors
- Glue & tape
- Marker pens
- Craft paper
- Fun embellishments and decorations
- Stickers
- Any photos or other souvenirs you want to include!
Step 4: Layout your items
Before you stick anything down, you’ll want to play around with the layout and composition. So place the photos, paper, embellishments and any other scraps you have on the page and have a little play around with them.
Don’t be afraid to deviate a little from your theme or layout. There’s no right or wrong way to scrapbook, and half the fun of it is expressing yourself creatively and adding your own creative expression.
If you’re looking for simple ways to experiment with your layout, we recommend trying the below.
Scrapbook layout tips:
- Select your photo as the main focal point on the page.
- Distribute your embellishments evenly across the page.
- Use layers to add depth to the page.
- Don’t be afraid to stack photos.
- Use a mix of solid colours and patterns.
- Leave consistent margin spaces across the pages.
- Don’t be afraid to throw in different textured materials.
- Experiment with different shapes.
- Don’t forget to leave space for your titles and captions!
Step 4: Stick your items down
Once you’ve settled on the perfect layout, it’s just a case of sticking it down. Depending on the theme or design, people typically use glue and tape to do this.
Step 5: Add your titles and captions to create a journal
Before you whip out the marker and start adding your titles and captions, we’d recommend adding them in pencil first or playing around with them on a disposable blank piece of paper.
This way you can play around with different things like:
- Fonts
- Size and weight
- Contrasting colours
- Shadows and outlines
- Stencils
- The shape and path of the text
Practicing it on a piece of paper also gives you a bit of room to figure out what to write before you commit it to the page. After all, there’s nothing more scary than the fear of completely ruining your perfectly curated scrapbook layout with a cringe caption.
Step 6: Sit back and enjoy your creation
Now that you've finished your beginner's scrapbook, it’s time to enjoy the fruits of your labour. Whether it’s a gift for someone else or you’re just documenting a life event - don’t be afraid to break it out every now and then. All those beautiful memories shouldn’t be stuck away in a box, gathering dust. No, they should be enjoyed.
Happy scrapbooking!
So there you have it. The complete beginner's guide to scrapbooking. You can now officially call yourself a “Scrapbooker” and start committing all those wonderful memories and life events to paper.
While you’re creating your first scrapbook, remember to:
1. Plan ahead
2. Don’t commit anything to glue until you’re ready
3. Use copies of your photos
4. Play around with your template
And most importantly, have fun.
If you’re looking for more inspiration for scrapbooking, check out our post on easy scrapbooking layouts or how to make a Father’s Day scrapbook. If you’re looking for other crafts to get stuck into, check out the crafts ideas section of our blog.


